Kataifi
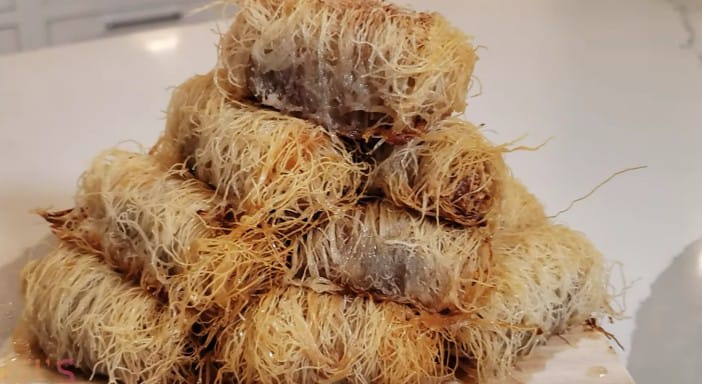
What is Kataifi dough?
Kataifi is a traditional Greek dessert made from a unique type of pastry called kataifi dough, which is essentially shredded phyllo dough. The dough is finely shredded into thin, thread-like strands, giving it a distinctive texture. Typically, kataifi is filled with a mixture of nuts, such as walnuts or almonds, spiced with cinnamon, and then rolled or layered. Once baked to a golden crisp, the pastry is soaked in a sweet syrup made from sugar, water, lemon juice, and sometimes honey, which infuses the pastry with rich flavor and moistness.
Where to Get Kataifi?
Kataifi dough is available in many specialty grocery stores & Online
You Can also Buy From Here
Kataifi is similar to baklava but stands out due to its unique appearance and texture. It is enjoyed across various cultures in the Mediterranean and Middle Eastern regions, often served as a dessert during special occasions and holidays. Its crispy, sweet, and slightly nutty flavor profile makes it a beloved treat among those who enjoy traditional Mediterranean desserts.
My Journey with Kataifi
I’ve always been fascinated by Greek cuisine, and kataifi is one of those dishes that instantly intrigued me. The delicate strands of kataifi dough, crispy on the outside and soft on the inside, create a dessert that's nothing short of magical. My journey with kataifi started with a bit of trial and error, but the result was a dish that my family now requests regularly. I’m excited to share my recipe with you, hoping it brings the same joy to your table as it does to mine.
Experience the crispy, golden strands of Greek dessert heaven with my personal recipe for kataifi, a treat that perfectly balances tradition and modern cooking methods.
Primary Ingredients for Two Servings
- Kataifi Dough: 200g (available in specialty stores or online)
- Unsalted Butter: 100g, melted
- Walnuts or Almonds: 50g, finely chopped
- Cinnamon: 1 tsp
- Sugar: 50g
- Water: 100ml
- Lemon Juice: 1 tbsp
- Honey: 2 tbsp
How to Make Kataifi ?
Step-by-Step Process
1.Preparation:
Preheat your oven to 180°C (350°F). If using an air fryer, preheat it to 160°C (320°F). Melt the butter and set it aside.
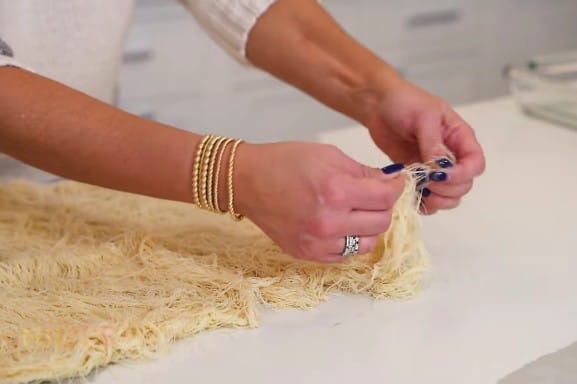
2.Unravel the Kataifi Dough:
Carefully unravel the kataifi dough. It's essential to be gentle to avoid breaking the strands. Lay the dough out on a clean, dry surface.
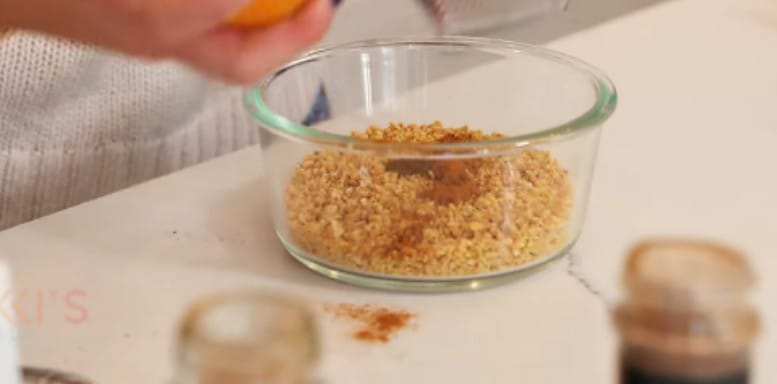
3.Prepare the Filling:
Mix the chopped walnuts (or almonds), cinnamon, and half of the sugar in a bowl. This will be the heart of your kataifi.
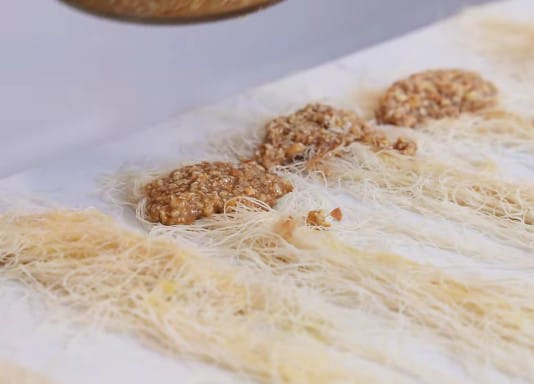
4.Assembly:
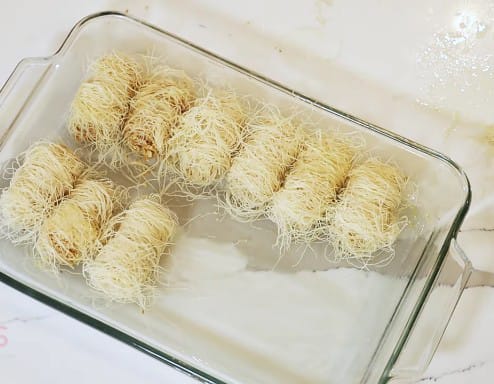
Take a small handful of the kataifi dough, roughly the size of your palm. Flatten it slightly and place a teaspoon of the filling in the center. Roll the dough around the filling, creating a log shape. Place it on a buttered baking tray. Repeat until all the dough and filling are used.
5.Butter It Up:
Brush the rolled kataifi generously with melted butter. Ensure every part of the dough is covered to achieve that golden, crispy texture.
6.Baking in the Oven:
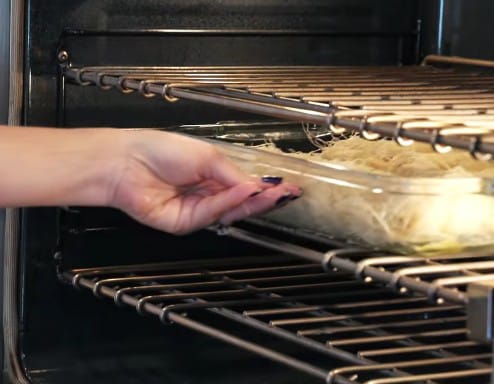
Place the tray in the preheated oven and bake for 25-30 minutes, or until the kataifi turns golden brown.
8.Air Fryer Alternative:
Place the kataifi logs in the air fryer basket, ensuring they don’t touch each other. Cook for 15-20 minutes, checking halfway through.
9.Syrup Preparation:
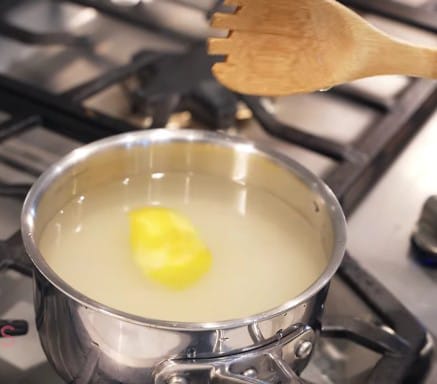
While the kataifi is baking, prepare the syrup. In a small saucepan, combine the water, remaining sugar, honey, and lemon juice. Bring it to a boil, then simmer for about 10 minutes until it thickens slightly.
10.Syrup Soaking:
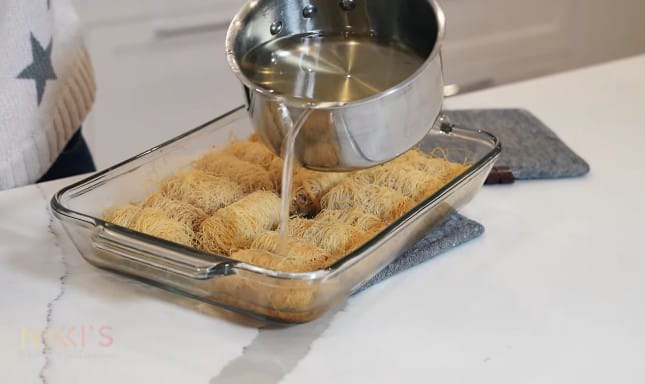
Once the kataifi is baked, remove it from the oven and immediately pour the hot syrup over the rolls. Let them soak for at least an hour before serving, allowing the syrup to permeate every strand of dough.
Final Recipe is ready for Serve

Kataifi Preparation & Cooking Time Chart
| Step | Task Description | Time Required |
|---|---|---|
| 1. Preparation | Preheat oven to 180°C (350°F) or air fryer to 160°C (320°F). Melt butter. | 10 minutes |
| 2. Unravel the Kataifi Dough | Gently unravel kataifi dough and lay it on a clean surface. | 5 minutes |
| 3. Prepare the Filling | Mix chopped walnuts (or almonds), cinnamon, and half of the sugar. | 5 minutes |
| 4. Assembly | Form logs by filling and rolling kataifi dough. | 15 minutes |
| 5. Butter It Up | Brush kataifi rolls generously with melted butter. | 5 minutes |
| 6. Baking (Oven) | Bake kataifi rolls in the oven until golden brown. | 25-30 minutes |
| 7. Air Fryer Alternative | Cook kataifi rolls in the air fryer until golden brown. | 15-20 minutes |
| 8. Syrup Preparation | Combine water, sugar, honey, and lemon juice. Simmer to thicken. | 10 minutes |
| 9. Syrup Soaking | Pour hot syrup over baked kataifi and let it soak. | 1 hour |
Using Oven: Approximately 1 hour 45 minutes to 2 hours
Using Air Fryer: Approximately 1 hour 35 minutes to 1 hour 50 minutes
This chart provides an estimated timeline to guide you through the preparation and cooking process for kataifi. The actual time may vary depending on your kitchen setup and pace.
Alternative Cooking Methods: Air Fryer and Oven Baking
Oven Baking:
- The traditional method provides even cooking and a uniform golden color. This method is perfect if you’re making a larger batch or prefer a classic approach.
Air Fryer:
- A faster, healthier alternative with less butter. The air fryer gives a similar crispiness but in less time, ideal for a quick treat.
Alternative Recipes: Keep It Exciting
Ekmek Kataifi:
- Layer your kataifi with a custard base and whipped cream for a decadent dessert that’s as visually stunning as it is delicious.
Nut-Free Kataifi:
- Replace the nuts with dried fruits like apricots or raisins for a different flavor profile. It’s perfect for those with nut allergies.
Storage Instructions
- Refrigerating: Store leftover kataifi in an airtight container in the fridge for up to 5 days. The dough may lose a bit of its crispness, but it will still be delicious.
- Freezing: Kataifi can be frozen before baking. Assemble the rolls, place them on a tray, and freeze until solid. Transfer to a freezer bag and store for up to 3 months. Bake directly from frozen, adding a few extra minutes to the cooking time.
- Reheating: Reheat in a preheated oven at 150°C (300°F) for about 10 minutes. Avoid microwaving, as it can make the dough soggy.
Side Dishes & Drink Pairings
Side Dishes:
- Serve kataifi alongside a fresh fruit salad or a dollop of Greek yogurt. The tartness of the yogurt complements the sweetness of the kataifi perfectly.
Drink Pairings:
- Pair with a strong Greek coffee or a glass of dessert wine like Moscato. The rich flavors balance the sweetness of the kataifi.
Recommended wines for Kataifi, Click on below link and find best drink pairing
Variations: Adding a Personal Touch
- Chocolate Drizzle: Melt some dark chocolate and drizzle it over the kataifi for a rich, indulgent treat.
- Orange Zest: Add a teaspoon of orange zest to the filling for a citrusy twist.
- Savory Kataifi: Experiment with a savory version by filling the kataifi with cheese or minced meat, and serving it as an appetizer.
Learn from My Experience
In my early attempts, I wasn’t careful with unrolling the kataifi dough, resulting in broken strands and uneven rolls. I also didn’t brush enough butter on the rolls the first time, leading to a less crispy texture. These little mishaps taught me the importance of patience and thoroughness in preparation.
This recipe is based on traditional methods with a few personal tweaks to suit my family’s tastes. The air fryer method is an adaptation for modern kitchens.
FAQs
1. What is kataifi?
Kataifi is a traditional Greek dessert made from shredded phyllo dough, filled with nuts, and soaked in syrup.
2. How do I make kataifi dough?
Kataifi dough is similar to phyllo dough but shredded. It’s best purchased pre-made as it’s challenging to make at home.
3. Can I use other nuts?
Absolutely! Pistachios, hazelnuts, or a mix of your favorites work well.
4. Is kataifi gluten-free?
No, traditional kataifi dough contains gluten. However, gluten-free versions are available in some stores.
Nutrition Chart
| Nutrient | Amount per Serving |
|---|---|
| Calories | 350 |
| Fat | 20g |
| Carbohydrates | 40g |
| Protein | 5g |
| Fiber | 2g |
| Sugar | 25g |
The nutritional content can be influenced by additional seasonings or toppings.
For a more accurate analysis, consider using a food tracking app or consulting a nutritionist.
Tips
- Work Quickly: Kataifi dough dries out fast, so keep it covered with a damp cloth while working.
- Generous Syrup: Don’t skimp on the syrup; it’s essential for the right texture and flavor.
- Experiment: Don’t be afraid to try new fillings or flavors.
GET IN TOUCH
Try making this delicious kataifi recipe today!
"Tag Your Friends who Would Loves This Recipe"!
Click here to explore and start cooking up something amazing today!
Recipe Card
Kataifi is a traditional Greek dessert made from a unique type of pastry called kataifi dough, which is essentially shredded phyllo dough. The dough is finely shredded into thin, thread-like strands, giving it a distinctive texture.
- 200 Dough: Kataifi g (available in specialty stores or online)
- 100 Butter: Unsalted g, melted
- 50 or Walnuts Almonds: g, finely chopped
- 1 Cinnamon: tsp
- 50 g Suar: g
- 100 ml Water:
- 1 Juice: Lemon tbsp
- 2 Honey: tbsp
- Preparation
Preheat your oven to 180°C (350°F). If using an air fryer, preheat it to 160°C (320°F). Melt the butter and set it aside.
- Unravel the Kataifi Dough:
Carefully unravel the kataifi dough. It’s essential to be gentle to avoid breaking the strands. Lay the dough out on a clean, dry surface.
- Prepare the Filling:
Mix the chopped walnuts (or almonds), cinnamon, and half of the sugar in a bowl. This will be the heart of your kataifi.
- Assembly
Take a small handful of the kataifi dough, roughly the size of your palm. Flatten it slightly and place a teaspoon of the filling in the center. Roll the dough around the filling, creating a log shape. Place it on a buttered baking tray. Repeat until all the dough and filling are used.
- Butter It Up:
Brush the rolled kataifi generously with melted butter. Ensure every part of the dough is covered to achieve that golden, crispy texture.
- Baking in the Oven:
Place the tray in the preheated oven and bake for 25-30 minutes, or until the kataifi turns golden brown.
- Air Fryer Alternative:
Place the kataifi logs in the air fryer basket, ensuring they don’t touch each other. Cook for 15-20 minutes, checking halfway through.
- Syrup Preparation:
While the kataifi is baking, prepare the syrup. In a small saucepan, combine the water, remaining sugar, honey, and lemon juice. Bring it to a boil, then simmer for about 10 minutes until it thickens slightly.
- Syrup Soaking:
Once the kataifi is baked, remove it from the oven and immediately pour the hot syrup over the rolls. Let them soak for at least an hour before serving, allowing the syrup to permeate every strand of dough.
Servings 2
- Amount Per Serving
- Calories 350kcal
- % Daily Value *
- Total Fat 20g31%
- Total Carbohydrate 40g14%
- Dietary Fiber 2g8%
- Sugars 25g
- Protein 5g10%
* Percent Daily Values are based on a 2,000 calorie diet. Your daily value may be higher or lower depending on your calorie needs.
Tips
- Work Quickly: Kataifi dough dries out fast, so keep it covered with a damp cloth while working.
- Generous Syrup: Don’t skimp on the syrup; it’s essential for the right texture and flavor.
- Experiment: Don’t be afraid to try new fillings or flavors.
THANK YOU
 Hi, I'm Sagar Rakshit, a food blogger based in India. I'm happily married and have the joy of sharing my life with my amazing family. My passion lies in exploring different cuisines, creating delicious recipes, and sharing my culinary adventures with you all.


