Chicken Deviled Egg Salad

Cooking with Memories
When I think about the best dishes I've ever created, they usually start with a memory. As a kid, I remember the excitement of family gatherings where deviled eggs always made an appearance. They were simple, yet something about the creamy filling and perfectly cooked whites made them irresistible. But as I grew older, my taste evolved, and so did my cooking style. I began to experiment with combining different flavors and textures, leading me to this delightful fusion—Chicken Deviled Egg Salad.
This dish is more than just a recipe; it's a journey back to those cherished memories, with a modern twist that makes it perfect for any occasion. It’s an appetizer, a salad, and a protein-packed snack all rolled into one. Whether you’re hosting a dinner party or looking for a light lunch, this recipe is a surefire hit.
Where Tradition Meets Innovation
The magic of this Chicken Deviled Egg Salad lies in its balance between old and new. The nostalgic taste of deviled eggs is enhanced by the addition of savory chicken, creating a dish that’s not only comforting but also exciting. It’s like a culinary bridge connecting the past with the present, making it ideal for those who appreciate tradition but aren’t afraid to try something new.
Ingredients for Two: The Essentials
Crafting this dish for two is as easy as gathering a few fresh ingredients:
- 4 large eggs: Hard-boiled and ready to go.
- 1 cup of cooked chicken breast: Shredded or finely diced.
- 2 tablespoons of mayonnaise: To bind everything together.
- 1 teaspoon of Dijon mustard: For that subtle zing.
- 1 tablespoon of chopped pickles or relish: Adds a touch of sweetness and crunch.
- Salt and pepper to taste: Because seasoning is key.
- A pinch of paprika: For a hint of heat and color.
Each ingredient is carefully chosen to create a balance of flavors that will keep you coming back for more.
Step-by-Step Process
Step 1: Boil the Eggs
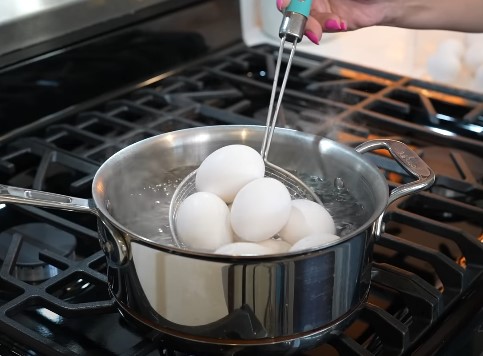
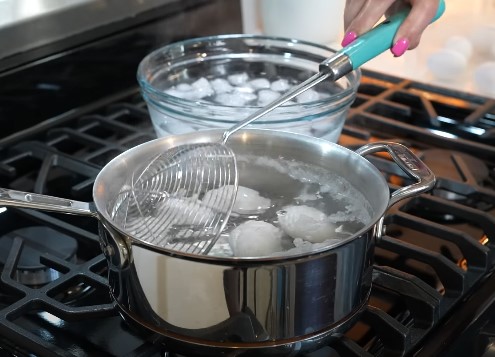
Begin by placing your eggs in a pot of cold water. Bring the water to a rolling boil, then reduce the heat to a gentle simmer. Let the eggs cook for 10 minutes before transferring them to an ice bath. This step ensures the eggs are perfectly cooked, with no gray ring around the yolk.
Step 2: Prepare the Chicken
If your chicken isn’t cooked yet, now’s the time. Whether you’re baking, grilling, or poaching, make sure it’s seasoned well. Once cooked, shred or finely chop the chicken. The key here is texture—small enough pieces to blend seamlessly with the egg filling, but still substantial enough to add that satisfying bite.
Step 3: Create the Filling
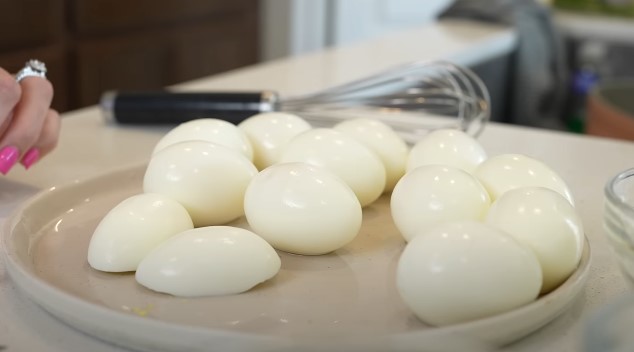
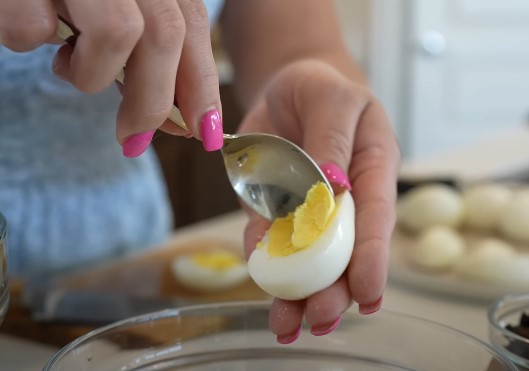
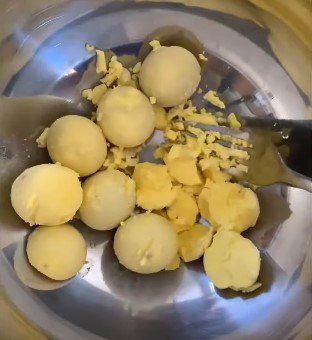
Cut the eggs in half lengthwise and gently scoop out the yolks. Mash the yolks in a bowl with mayonnaise, Dijon mustard, and chopped pickles. The goal is a smooth, creamy mixture that’s bursting with flavor. Don’t forget to season with salt and pepper.
Step 4: Combine with Chicken
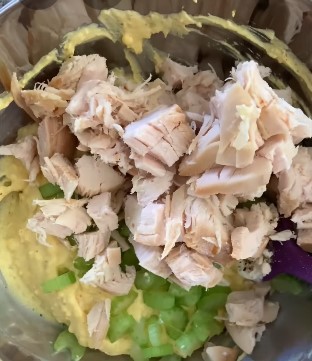
Fold the shredded chicken into the yolk mixture, ensuring an even distribution of flavors. At this point, you can taste and adjust the seasoning as needed.

Step 5: Assemble and Garnish
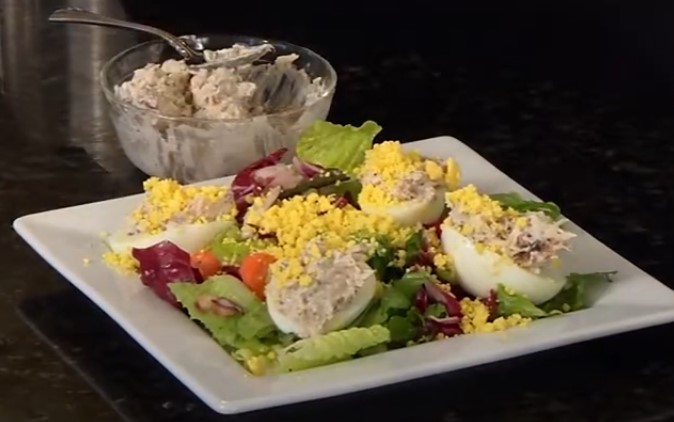
You can either spoon the mixture back into the egg whites for a traditional deviled egg presentation or mix everything together in a bowl for a more rustic salad. Either way, a sprinkle of paprika on top adds the perfect finishing touch.
Step 6: Serve
This salad is best served chilled. It’s light, refreshing, and has just the right amount of richness to satisfy your cravings.

Preparation Time Chart: Chicken Deviled Egg Salad
| Task | Time (Minutes) |
|---|---|
| Boiling Eggs | 12 minutes |
| Cooling and Peeling Eggs | 5 minutes |
| Cooking Chicken | 15-20 minutes (Air Fryer/Oven) |
| Shredding/Chopping Chicken | 5 minutes |
| Mixing Filling | 5 minutes |
| Assembling Salad | 5 minutes |
| Garnishing | 2 minutes |
| Total Active Preparation Time | 34-39 minutes |
| Chill Time (Optional) | 30 minutes |
| Total Time with Chilling | 64-69 minutes |
Beyond the Basics: Air Fryer and Oven Options
Air Fryer
For those who love convenience, cooking the chicken in an air fryer is a fantastic option. Season the chicken, place it in the air fryer at 375°F (190°C), and cook for 15-20 minutes. The result is juicy, tender chicken with minimal effort.
Oven Baking
Alternatively, you can bake the chicken. Preheat your oven to 400°F (200°C), season the chicken, and bake for 20-25 minutes. Oven-baked chicken is always a winner for its evenly cooked, succulent meat.
"Upgrade Your Kitchen Today – Explore More Air Fryers & Ovens!"
Recipe Variations: Making It Your Own
This Chicken Deviled Egg Salad is incredibly versatile. Here are a few ways to customize it:
- Spicy Kick: Add a few drops of Sriracha or a dash of cayenne pepper for some heat.
- Creamy Avocado Twist: Substitute half the mayonnaise with mashed avocado for a healthier, creamier filling.
- Herb-Infused: Fresh herbs like dill, parsley, or chives can brighten up the flavors.
Storage Secrets: Keeping It Fresh
Refrigeration
Store the salad in an airtight container in the fridge. It will stay fresh for up to 3 days. This makes it a great option for meal prep or to have on hand for quick lunches.
Freezing
While freezing isn’t recommended for the complete dish due to the eggs, you can freeze the chicken filling. Simply thaw in the fridge and pair with freshly boiled eggs when you’re ready to enjoy.
Reheating
This dish is best enjoyed cold, so no reheating is necessary. If you’ve frozen the filling, allow it to thaw overnight in the fridge.
Perfect Pairings: Complement Your Meal
Side Dishes
Serve this salad with a light side, such as a mixed greens salad or fresh fruit. A slice of whole-grain bread can also complement the flavors beautifully.
Drink Pairings
A crisp white wine like Pinot Grigio or a sparkling water with a splash of lemon makes an excellent pairing. For non-alcoholic options, iced green tea is a refreshing choice.
Mistakes to Avoid
Overcooking the Eggs
This one’s crucial. Overcooked eggs can lead to a rubbery texture and an unappetizing gray ring around the yolk. Keep a close eye on your timer.
Under-seasoning the Chicken
Don’t skimp on seasoning the chicken. It’s the backbone of the dish, so make sure it’s flavorful.
Skipping the Garnish
It’s easy to overlook the garnish, but don’t! That dash of paprika or fresh herbs adds not just flavor but also visual appeal.
This recipe was developed through personal experimentation and taste testing. Feel free to adjust and modify it to suit your tastes and dietary preferences.
FAQs: Your Questions Answered
Can I use store-bought rotisserie chicken?
Yes, it’s a great time-saver! Just shred it and mix it in.
What’s a good mayo substitute?
Greek yogurt or sour cream are excellent alternatives if you’re looking for something lighter.
Can I make this dish in advance?
Absolutely. It actually tastes better after a few hours in the fridge as the flavors meld together.
How do I prevent the eggs from cracking during boiling?
Start with cold water and avoid rapid boiling. Adding a pinch of salt can also help.
Nutrition Chart: Chicken Deviled Egg Salad
Per Serving (Serves 2)
| Nutrient | Amount |
|---|---|
| Calories | 250 kcal |
| Total Fat | 15g |
| - Saturated Fat | 3g |
| Cholesterol | 225mg |
| Sodium | 230mg |
| Total Carbohydrates | 3g |
| - Dietary Fiber | 0g |
| - Sugars | 1g |
| Protein | 20g |
| Vitamin A | 8% DV |
| Vitamin C | 2% DV |
| Calcium | 4% DV |
| Iron | 8% DV |
This chart gives your readers a clear understanding of the nutritional content of the dish, which can be particularly useful for those following specific dietary guidelines.
Pro Tips: Getting It Just Right
- Use fresh eggs: Fresh eggs are easier to peel after boiling, ensuring a smooth presentation.
- Taste as you go: Adjust the seasoning during each step to ensure a balanced flavor profile.
- Chill before serving: This dish tastes best when it’s had time to chill in the refrigerator, allowing the flavors to fully develop.
GET IN TOUCH
"Cook It, Love It, Share It!"
Schedule "Make Every Meal a Masterpiece
Recipe Card
Chicken Deviled Egg Salad—a perfect blend of tradition and innovation. Discover how to make it.
- 4 large eggs: Hard-boiled and ready to go.
- 1 cup of cooked chicken breast: Shredded or finely diced.
- 2 tablespoons of mayonnaise: To bind everything together.
- 1 teaspoon of Dijon mustard: For that subtle zing.
- 1 tablespoon of chopped pickles or relish: Adds a touch of sweetness and crunch.
- Salt and pepper to taste: Because seasoning is key.
- A pinch of paprika: For a hint of heat and color.
- Boil the Eggs
Begin by placing your eggs in a pot of cold water. Bring the water to a rolling boil, then reduce the heat to a gentle simmer. Let the eggs cook for 10 minutes before transferring them to an ice bath. This step ensures the eggs are perfectly cooked, with no gray ring around the yolk.
- Prepare the Chicken
If your chicken isn’t cooked yet, now’s the time. Whether you’re baking, grilling, or poaching, make sure it’s seasoned well. Once cooked, shred or finely chop the chicken. The key here is texture—small enough pieces to blend seamlessly with the egg filling, but still substantial enough to add that satisfying bite.
- Create the Filling
Cut the eggs in half lengthwise and gently scoop out the yolks. Mash the yolks in a bowl with mayonnaise, Dijon mustard, and chopped pickles. The goal is a smooth, creamy mixture that’s bursting with flavor. Don’t forget to season with salt and pepper.
- Combine with Chicken
Fold the shredded chicken into the yolk mixture, ensuring an even distribution of flavors. At this point, you can taste and adjust the seasoning as needed.
- Assemble and Garnish
You can either spoon the mixture back into the egg whites for a traditional deviled egg presentation or mix everything together in a bowl for a more rustic salad. Either way, a sprinkle of paprika on top adds the perfect finishing touch.
- Serve
This salad is best served chilled. It’s light, refreshing, and has just the right amount of richness to satisfy your cravings.
Servings 2
- Amount Per Serving
- Calories 212kcal
- % Daily Value *
- Total Fat 15g24%
- Cholesterol 225mg75%
- Sodium 230mg10%
- Protein 20g40%
* Percent Daily Values are based on a 2,000 calorie diet. Your daily value may be higher or lower depending on your calorie needs.
Pro Tips: Getting It Just Right
- Use fresh eggs: Fresh eggs are easier to peel after boiling, ensuring a smooth presentation.
- Taste as you go: Adjust the seasoning during each step to ensure a balanced flavor profile.
- Chill before serving: This dish tastes best when it’s had time to chill in the refrigerator, allowing the flavors to fully develop.
THANK YOU
 Hi, I'm Sagar Rakshit, a food blogger based in India. I'm happily married and have the joy of sharing my life with my amazing family. My passion lies in exploring different cuisines, creating delicious recipes, and sharing my culinary adventures with you all.


